Thursday, August 30, 2012

The Rubber Cafe' New Release Blog Hop - Day 4


Welcome to The Rubber Cafe new release blog hop. This is Day 4 and today you'll just be hopping with me !!

If you just happened to visit my blog today and would like to start this BLOG HOP from the beginning, it's not too late just simply follow THIS LINK to be taken to Day 1 of The Rubber Cafe blog where this celebration began!

There will be a Grand Prize for one lucky winner plus smaller prizes along the way. . . so be sure to stop at each blog and leave a comment to be registered. Don't forget to also leave a comment on each main blog post at The Rubber Cafe too.

We are celebrating the newest release called:

On the Fence Bundle

on-the-fence-bundle

This bundle comes with a brand new exclusive die template manufactured by Spellbinders Paper Arts called On the Fence Die!
What makes this die unique? It's versatility! At first glance, you might see just a fence but soon you'll realize it can be so much more. Follow us on the blog hop each day from August 27-31 to find out what all this die can do.

So on with the Hop!! My project for today continues with my post from Saturday where I introduced the first part of my "Home Sweet Home" wall hanging -


Here's the rest of my banner - the fun part of this project was in using the new On the Fence die! It's versatility amazed me! Each time I've teamed it with the Window Garden set, but I tried to use it differently for each portion of my banner.
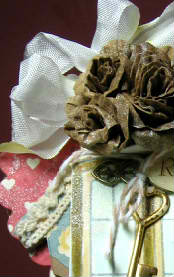
  • In the first part of my wall hanging I made the cluster of coorigatged chipboard roses with the On the fence die. I added sparkle by gently spritzing with a Frosted sparkle spray made by Tsukineko.

  • For the 'Sweet' part of my 'Home Sweet Home' - I created this Sweet Shoppe, usint our Fence die to cut my striped awning I paired it with the Window Garden set which just turned out too fun! I also added a corner of fence on the lower edge cut again from corrugated cardboard.

  • The last 'Home' section I think may be my favorite! Here I used the Fence die as a fence, but my special twist, I wove my black gingham ribbon through for a finishing touch.     


Here's a close up of my roses. 


And here's a quick tutorial  how I made these!
Gather your supplies:
 
  1. Recycled Seattles best coffee sleeves - for the coorigated cardstock(I hit the convenience store at the Chevron station almost every morning on my way to work and found I just couldnt' throw these away)
  2. A Diecut machine, like a Cuddlebug, Big Shot, or Grand Caliber
  3. Scrap Happy Glue - premade and setup over night to create my own goober glue bases.
 
Let's begin:
  1. Using your favorite die cut machine, cut out 2 fence lengths for the larger rose about 1 " in diamter, and 1 fence length will do the smaller 1/2" size.
  2.  


  3. Before you start to roll cut each fence piece heighth down by half, if this is still too high when you're done rolling, you can cut it down some more.  For this project the heigth worked for me and gave me something to wrap my ribbon around - but for a card or scrapbook page you may want it to sit a little closer to the page.  


To roll your rose
  1. start one end and rolling the cooragated texture towards the inside start to roll and bend the tips back.  .
  2.  

  3. For the bigger rose, I added a second section of fence - the smaller roses were made with just one section- you can cut to fit the size of flower you like.
  4.  
     
  5. Once it's rolled to the shape and size you want place down on your pre-made Glubers!  If you need to adhere any more layers use a fast drying glue like Fabric-taq or a hot glue gun.  
  6.  
    I made my own Gluber (Glue-dots) using Scrap Happy Glue.  I punched a piece of cardstock with a 1"circles along the length to act as a pattern or mask.  Directly below is some clear packaging I'm recyling for the purpose of storing my Gluber.  This size works great for anchoring rose flowers. So found making my own to give me just the size I need. 
    Squeezing the glue I filled in each circle so it covered moving the tip around and being careful to not get it too thick.  I set this aside over night to 'cure', it will remain tacky and if stored in a plastic baggie can be kept for quite awhile.

     
  7. Spritz, Ink or color as you'd like, this works great with colored cardstock too!
That's it for today, be sure to check back into the Rubber Cafe' blog tomorrow and see what Kristine and Jen have to share with you.  But before you go be sure to leave your comments here as well as back at the The Rubber Cafe' blog here to be eligible for the grand prize.

Good luck and have fun hopping!
Supplies:
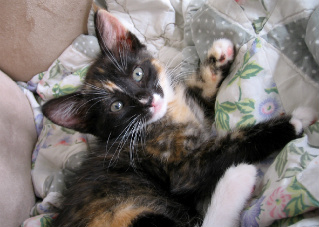
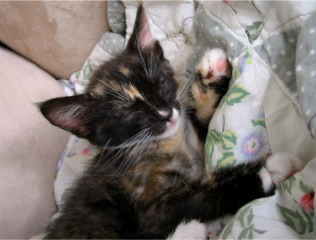
Stamps:  The Rubber Cafe' - Window Garden, Home is Where Your Cat Sleeps
Ink:  Memento- Dove Gray, Black, Ranger Distress Markers and Ink, Aged Mahogony
Adhesives:  The Rubber Cafe' - Scrap Happy Glue
Embellishments:  Ribbon, adhesive crochet trim, misc gold charms, double circle paper clips large eyelets.
Tools:  The Rubber Cafe' - Spellbinders- On the Fence Die, Scallop and Smooth Hearts, various Sizzix Bigz Dies, Birdhouse, Sweet phrase, Scallop circles  

Saturday, August 25, 2012

The Rubber Cafe' - Home Sweet Home

It's another weekend! I don't know about you - but this week just sailed by!

Well we're busy here at The Rubber Cafe', getting ready for our New Release Blog Hop planned for next week, so check back in here tomorrow for our Sneak Peek intro and the rest of the week as The Design Team and The Rubber Cafe' Glueistas' share their cards and projects we hope will inspire you.

So today I'm here to send out a 'teaser' - my project today is a portion of my blog hop post. Featuring the Window Garden set and On the Fence Die.   Head back on over to the Rubber Cafe' Blog, to get the full story.


Saturday, August 18, 2012

Update on my Latest Edition!

I have a second post to share,as I did get some pictures of my latest addition!

Friday I brought home a new addition to my very small family - a new little calico kitten. A woman at work brought in a litter of kittens and there she was! She's somewhere around 6 weeks old, and such a pretty little girl.  Last night while I was setting up my Rubber Cafe' post - she jumped up and crawled on my shoulder and there she saw while I was typing my post! Too cute! I'm sure she's missing her litter mates, so for now I'm the next best thing. Earlier as I finished up my project this little darling was taking a little 'cat' nap on my work table so I just had to add this sweet sleeping cat from the Home is Where Your Cat Sleeps...  stampset.
Here she is still nameless so I'm open to suggestions!  But I'm sure it will come to me as her adorable personality reveals itself!

Finally settling in one place!!


Now I've got her attention!  Smile for the camera!!


Sleep at last....


The Rubber Cafe'- Home is Where...


Hi -  It's the weekend, and I have another post to share with you from the Rubber Cafe' -  I love how this project took on a life of it's own.  Here's some sneak peak pics- to see the rest you have to head over to the Blog!


Have a great weekend! 


Stay tuned!  The Rubber Cafe' is going to be hosting a New release Blog Hop at the end of the month !  Featuring projects from both our new Design Team, and Glueistas!  You won't want to miss it so mark your calendars and Join us at the The Rubber Cafe' Blog for the kick-off and sneak peak Sunday August 26!


Sunday, August 12, 2012

Just My Type -'Type Hype' - Moxie Fab Trigger Challenge

Today - I'm sharing a card I made for the Moxie Fab Trigger Challenge, 'Type-Hype!  When I saw this it seemed to perfect to pull out one of my all time faves from The Rubber Cafe' - also called 'Just My Type'.


And here's my card, I loved the colored keys' so on my card, so I inserted tiny small gems, that I colored with various colors usng my Copic and Prisma alchohol markers!

It also seemed the perfect card to try as a pull up card template. 
Here it is with the message fully extended. 


Here's the card with just the first phrase exposed.


Here's another view.  The top layer is popped with dimensional adhesive so the paper can freely pull up and reveal the rest of the 'hugs and kisses' message.


That's it for tonight!  Have a great week -
Supplies:
Ink:  Memento - Rich Cocoa, and Ranger Walnut Stain, and Tea Dye Distress Ink, Copic Markers, Faber-Castell -fine line grey and black Pitt Markers.
Paper: Stampin'Up! - Naturals White cardstock, MME patterned paper
Embellishment: - Tim Holtz mini paper clip


Saturday, August 4, 2012

Flower Pot Gift Card - The Rubber Cafe

Hi Everyone, and thanks for stopping by today.

There's great excitement going on over at the Rubber Cafe' - as we reveal our new Design Team.  I'm happy to say I've been invited to stay for another term, and even more excited to share that I've also been given the honor of Design Team Coordinator!  I am honored and humbled by this invitation and really look forward to working with such a talented group of ladies. 
So join me over at the The Rubber Cafe' Blog - share in the news, get caught up and to help kick it all off - I have a fun new project to share with you.  Here's just a peek... but to get the rest details you'll have to go here.


Thursday, August 2, 2012

Tim Holtz - 12 Tags of 2012 August

Today, I wanted to share my project for Tim's August Tag.  Instead of an ATC card I found the perfect frame in my stash that totally inspired me after seeing Tim's tag and after watching his tutorial on making rolled roses from his Pinecone die, and using 'Coordenations' paper.  Well let's just say, I had to sit down and make some of my own!

Here's Tim's gorgeous tag.


and here's my project.

and a closeup - to show you these gorgeous flowers!


  To finish up, I sprayed a new shimmer spray on the Roses, and added a dove and a corner piece of Doilee.  My silhouette is a chipboard piece from Maya Roads. I heat embossed it with Ranger Black embossing powder, before adhering it against the background.